GeerTop PYRAMID Tent
Additional Information
Click HERE to go to purchase page
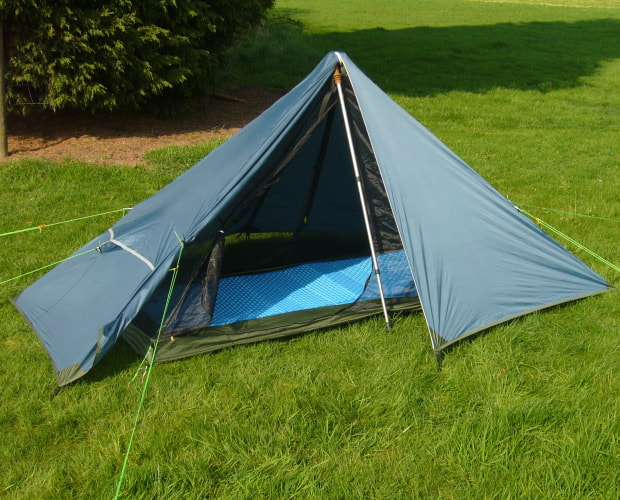
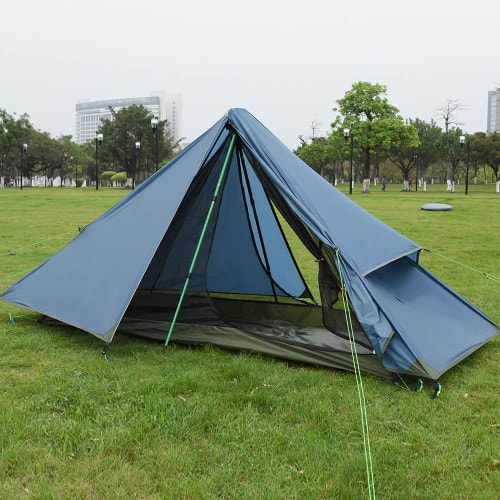
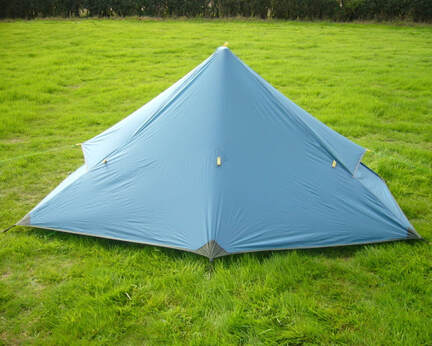
The GeerTop PYRAMID tent, without any dedicated tent poles provides a substantially smaller, lighter package than either our Glencoe 1/TOPWIND 1 or BLAZER/Backpacker tents, and again straight out of the box everything looks and feels like quality.
The PYRAMID employs a flysheet of the same material as the TOPWIND 1, that is 20D 360T 3000mm HH silicone-coated ripstop nylon with taped seams and UV protection. The inner tent though, is all fine nylon bug mesh apart from the bathtub floor, which employs a 55D silicone-coated 5000mm waterproof nylon fabric.
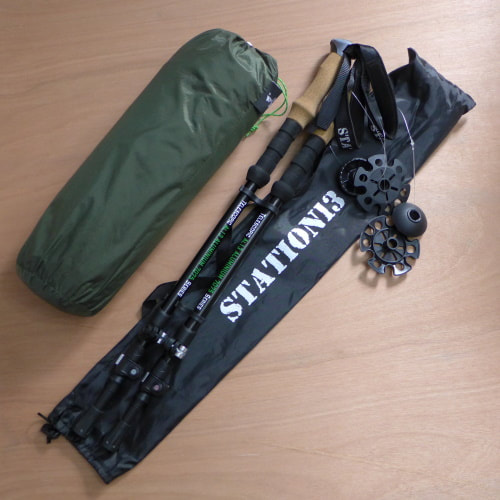
Weight is kept down by the fact that the PYRAMID has no dedicated tent poles and instead is designed to be used with your own walking/trekking poles.
The PYRAMID employs a flysheet of the same material as the TOPWIND 1, that is 20D 360T 3000mm HH silicone-coated ripstop nylon with taped seams and UV protection. The inner tent though, is all fine nylon bug mesh apart from the bathtub floor, which employs a 55D silicone-coated 5000mm waterproof nylon fabric.
Weight is kept down by the fact that the PYRAMID has no dedicated tent poles and instead is designed to be used with your own walking/trekking poles.
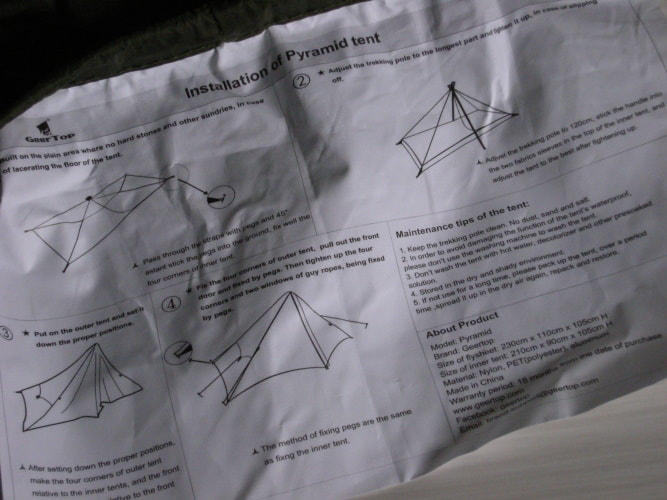
Instructions are sewn into the tent bag
|
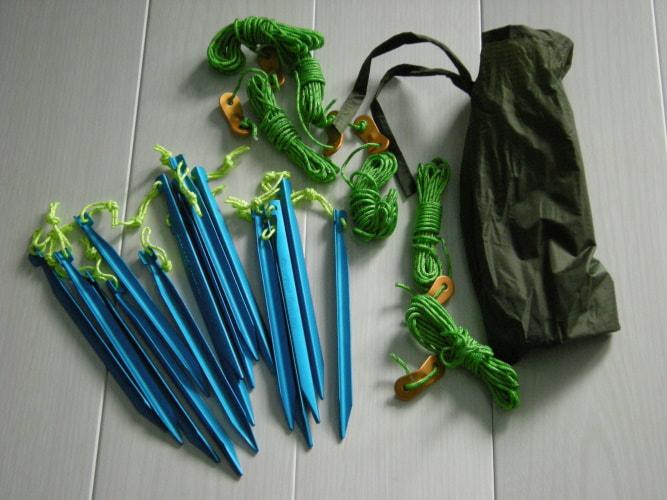
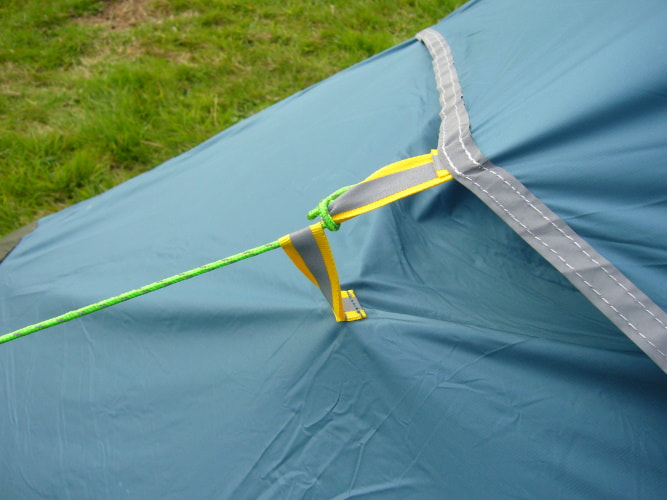
Very nice Alloy V-pegs and 6 guylines are included
|
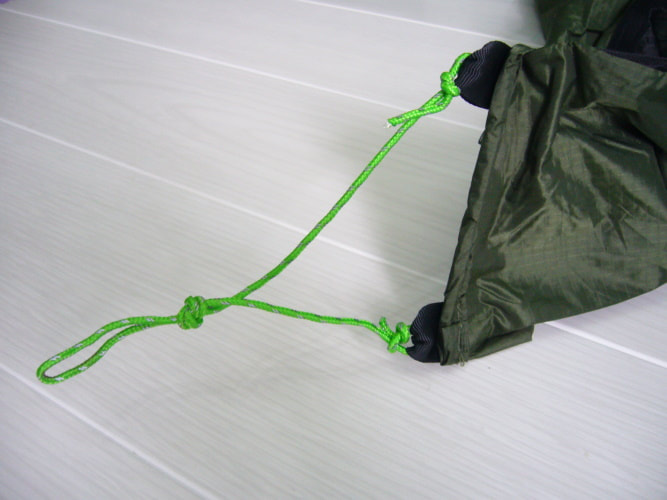
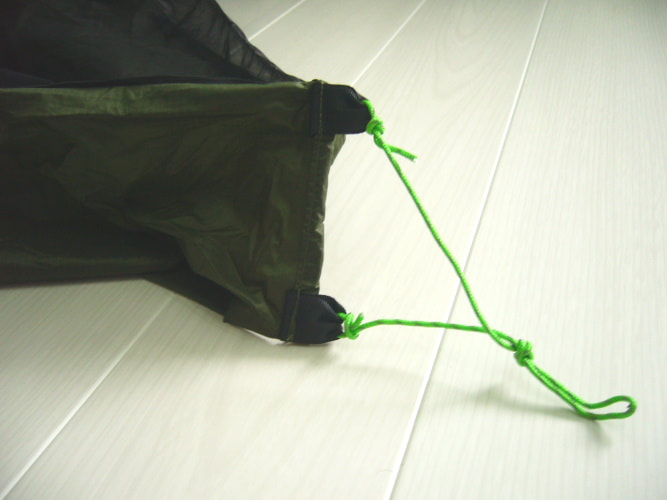
Once again the V-section aluminium pegs are extremely good quality and they are also anodised for extra corrosion resistance. All the guylines are a bright green and highly reflective under torchlight which helps you avoid tripping over them in the dark when making any necessary nighttime excursions.
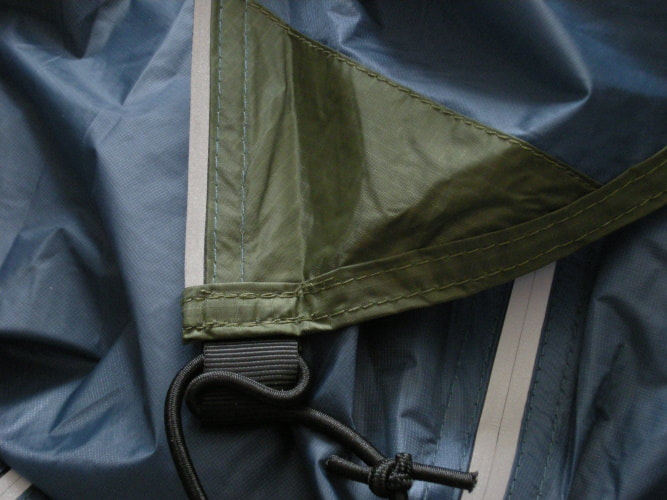
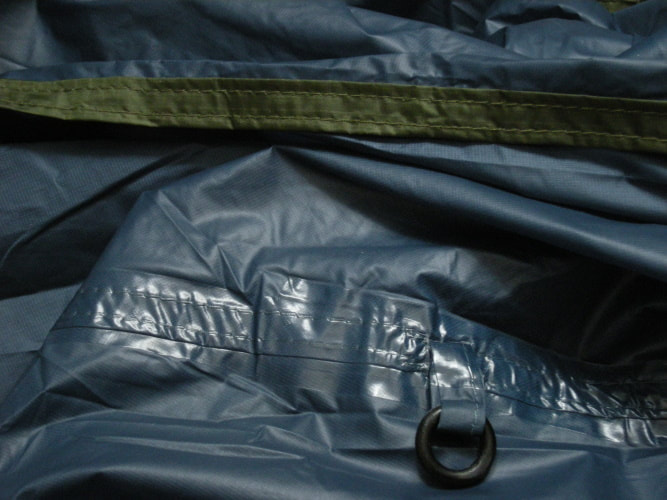
As with our other tents the seams are sealed where necessary, with all seams and edges being double-stitched, with reinforced stitching at any potential stress points. Both tents do also have fabric pitching instructions sewed into the main carry bags, which is a nice touch.
As with our other tents the seams are sealed where necessary, with all seams and edges being double-stitched, with reinforced stitching at any potential stress points. Both tents do also have fabric pitching instructions sewed into the main carry bags, which is a nice touch.
|
|
So, first impressions are extremely favourable and we are quite excited by these little tents. Now for some real world testing…
|
|
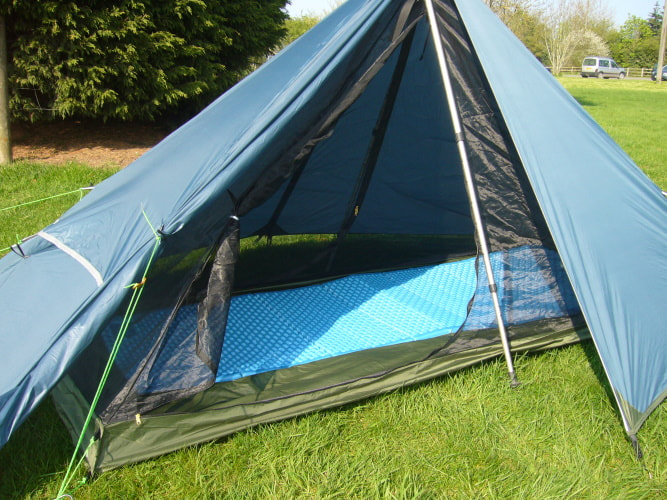
Above: Sewn-in corner uprights nicely raise bathtub sides. This new feature of the bathtub floor automatically pulls the uprights up by 100mm (4") when staking out the inner tent, while also reducing sagging of the inner mesh tent. We found that we did initially have to untie and slightly adjust the top line length to get the upright nice and vertical, but it only took a couple of minutes and only needs to be done on the first time setting up
|
|
GeerTop PYRAMID Ultralight 1 Person Tent - Initial Set Up
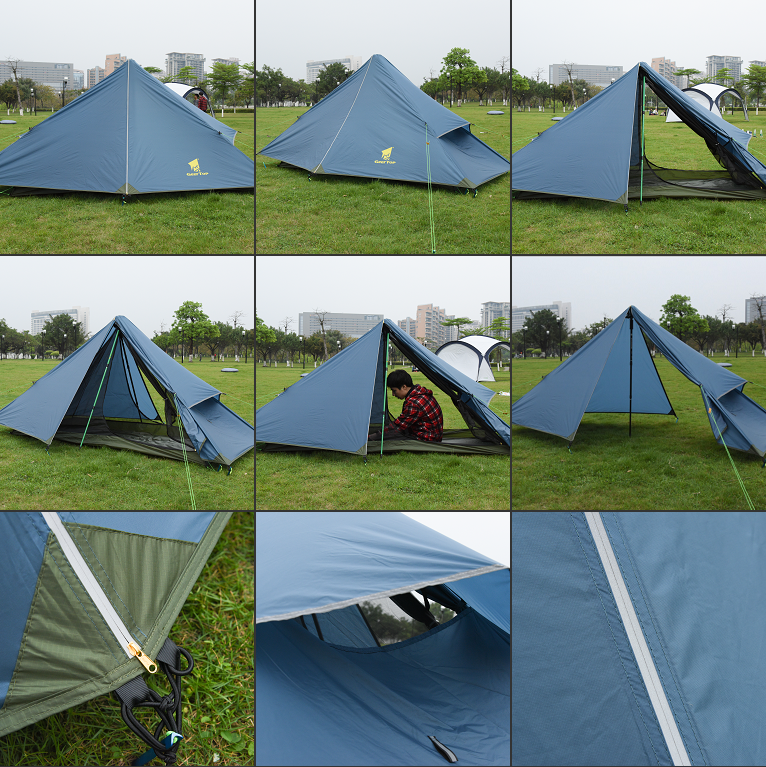
Setting up the PYRAMID was in complete contrast to our TOPWIND1. The fact that it employs your walking poles was always likely to make this a more challenging first time set up, and indeed it did take us a little longer than our TOPWIND 1. However, we learned a lot. Unlike the TOPWIND 1, we would strongly suggest that you set this tent up at least once before you intend to use it just in order to get a measure of it.
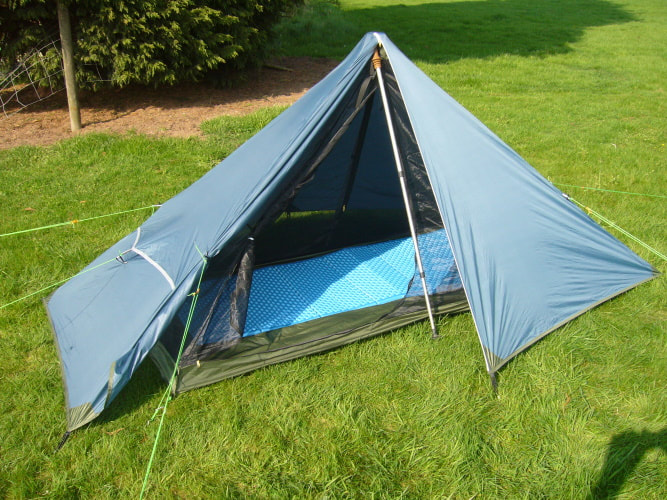
When we initially set the tent up, the flysheet would not come down to the ground on one side, and we quickly realised that we had our walking poles set too long. On reading the instructions attached to the tent bag, we saw that the recommended walking pole length is 120cm. The problem was that we did not happen to have a tape measure with us at the time and the markings had worn away on the poles we were using. Anyway we were pretty sure we had our walking poles set too long, so we shortened each one bit by bit until the flysheet nicely met the ground on all sides. This is one reason why you might need a bit of practice erecting this tent as at any given length of walking pole, the angle you set them in the ground will obviously make a difference to the effective height of the tent, and hence how the inner and flysheet hang. With the PYRAMID tent, you firstly lay out the inner tent, peg the four corners and then insert you walking poles into the sleeves at the top. Once you have done this, it will stand up by itself. Then you simply drape the flysheet over the top and peg out evenly. So, it is by no means complicated, it simply requires you to get the initial walking pole settings correct. We pegged the flysheet out roughly to start with, then adjusted each peg to provide a nice even, taut shape.
Our walking poles are the telescopic sort, and not knowing what length we had ours set at, we left one pole extended in order to measure it later. It turned out that we had extended our poles to 126cm, so 6cm more than recommended by the manufacturer. Incidentally the measured distance was from the very top of the walking pole handle, to the cup - the 60cm spike below the cup was secured into the ground so did not affect the total length.
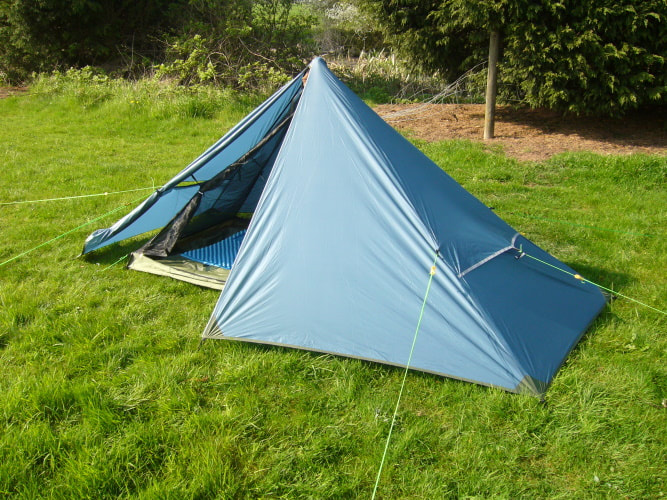
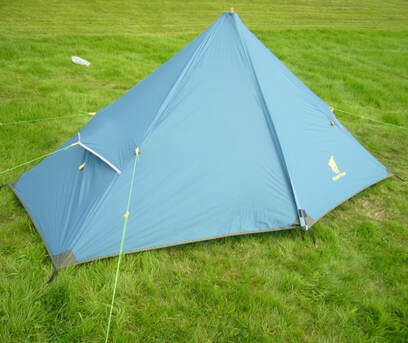
Once up and stabilised with guylines, the tent looked pretty good.
It should also be noted that the PYRAMID tent can be used with just the flysheet and a single walking pole if required.
When we initially set the tent up, the flysheet would not come down to the ground on one side, and we quickly realised that we had our walking poles set too long. On reading the instructions attached to the tent bag, we saw that the recommended walking pole length is 120cm. The problem was that we did not happen to have a tape measure with us at the time and the markings had worn away on the poles we were using. Anyway we were pretty sure we had our walking poles set too long, so we shortened each one bit by bit until the flysheet nicely met the ground on all sides. This is one reason why you might need a bit of practice erecting this tent as at any given length of walking pole, the angle you set them in the ground will obviously make a difference to the effective height of the tent, and hence how the inner and flysheet hang. With the PYRAMID tent, you firstly lay out the inner tent, peg the four corners and then insert you walking poles into the sleeves at the top. Once you have done this, it will stand up by itself. Then you simply drape the flysheet over the top and peg out evenly. So, it is by no means complicated, it simply requires you to get the initial walking pole settings correct. We pegged the flysheet out roughly to start with, then adjusted each peg to provide a nice even, taut shape.
Our walking poles are the telescopic sort, and not knowing what length we had ours set at, we left one pole extended in order to measure it later. It turned out that we had extended our poles to 126cm, so 6cm more than recommended by the manufacturer. Incidentally the measured distance was from the very top of the walking pole handle, to the cup - the 60cm spike below the cup was secured into the ground so did not affect the total length.
Once up and stabilised with guylines, the tent looked pretty good.
It should also be noted that the PYRAMID tent can be used with just the flysheet and a single walking pole if required.

|
|
|
|
|
|
The PYRAMID tent has the same inner tent footprint as our Glencoe 1/TOPWIND 1 tents, but due to the effective A-frame set up, the sides of the tent are at a much shallower angle. The pyramidal shape effectively provides less internal space than the TOPWIND 1, and you do feel you are much closer to the sides of the inner tent mesh, however, there are tie clips that attach the inner to the fly in order to prevent the inner sagging too much. So, although you can sit up in both tents, the PYRAMID is not, and does not, feel as spacious as our Glencoe 1/TOPWIND 1.
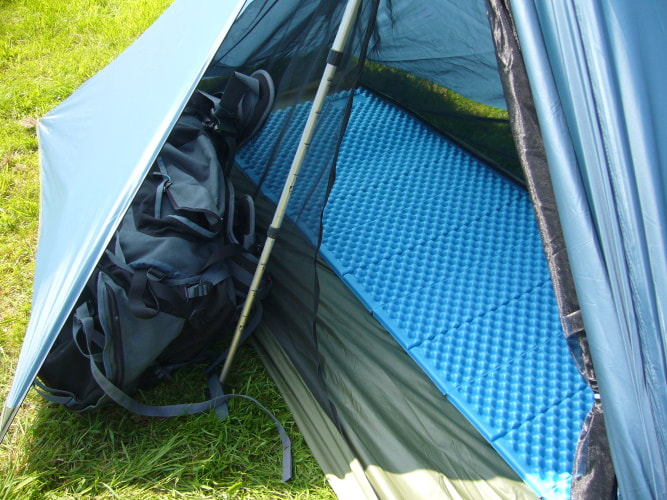
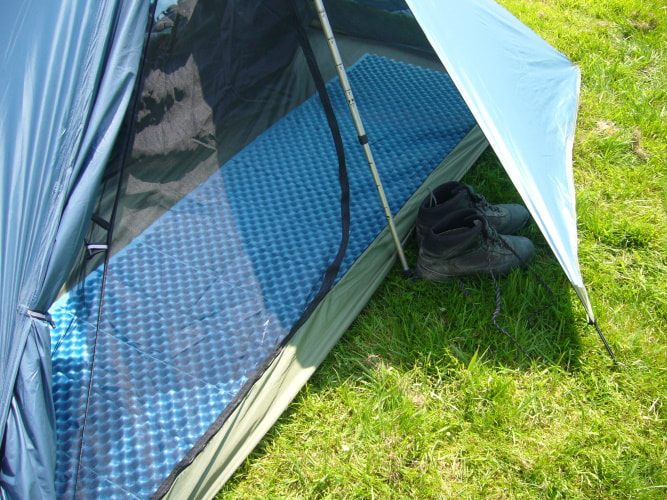
Now, we were slightly concerned that the shallow angles might mean that the head and feet of a taller person might push the inner mesh tent onto the flysheet when lying down, but, as you can see from the first photo below, the flysheet on this tent is actually quite a distance from the inner tent. At 5'11", and with the floor plan the same 210cm x 90cm as the TOPWIND 1, the length was just OK for me, but the shallower sloping sides mean that anyone over 5'9"/5'10" might find the useable length too short. That said, the thickness of your inflatable mattress will come into play here, as a very thick mattress will effectively raise you up into a narrower part of the tent - this is not a tent for tall people! At its highest central point you have a head height of around 100cm (this will vary slightly depending on the length you have set you walking poles at).
Again, like the TOPWIND 1 there was room enough between the flysheet and the inner for my 65 litre rucksack and boots. Unlike the TOPWIND 1 with its near full polyester fabric inner tent, apart from the bathtub floor, the PYRAMID has an all mesh inner tent. This does mean that it could potentially get quite chilly and feel draughty at certain times of the year.
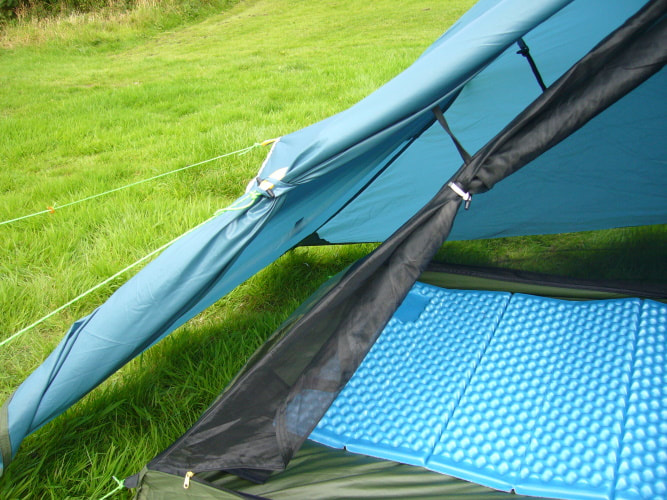
Initially we only connected the two side guylines, and even with just the two pegged out, the tent seemed very stable, we couldn't imagine the tent going anywhere very fast if you pegged out all six guylines and 16 tent pegs! The two air vents on the side of the flysheet are both held open by the side guylines. We played about a little with this until we realised that you can close up the vent by simply running the guyline attached to the top of the vent through the loop on the lower vent material (see third photo below).
With only the two side guylines pegged out we found that the lower material of the air vents sagged very close or even onto the mesh inner tent, which we did not like at all and indeed this did concern us. However, this situation rectified itself immediately once we had attached and pegged out the remaining four corner guylines. This naturally pulled taut the lower air vent material and instantly resolved the issue.
Now, we were slightly concerned that the shallow angles might mean that the head and feet of a taller person might push the inner mesh tent onto the flysheet when lying down, but, as you can see from the first photo below, the flysheet on this tent is actually quite a distance from the inner tent. At 5'11", and with the floor plan the same 210cm x 90cm as the TOPWIND 1, the length was just OK for me, but the shallower sloping sides mean that anyone over 5'9"/5'10" might find the useable length too short. That said, the thickness of your inflatable mattress will come into play here, as a very thick mattress will effectively raise you up into a narrower part of the tent - this is not a tent for tall people! At its highest central point you have a head height of around 100cm (this will vary slightly depending on the length you have set you walking poles at).
Again, like the TOPWIND 1 there was room enough between the flysheet and the inner for my 65 litre rucksack and boots. Unlike the TOPWIND 1 with its near full polyester fabric inner tent, apart from the bathtub floor, the PYRAMID has an all mesh inner tent. This does mean that it could potentially get quite chilly and feel draughty at certain times of the year.
Initially we only connected the two side guylines, and even with just the two pegged out, the tent seemed very stable, we couldn't imagine the tent going anywhere very fast if you pegged out all six guylines and 16 tent pegs! The two air vents on the side of the flysheet are both held open by the side guylines. We played about a little with this until we realised that you can close up the vent by simply running the guyline attached to the top of the vent through the loop on the lower vent material (see third photo below).
With only the two side guylines pegged out we found that the lower material of the air vents sagged very close or even onto the mesh inner tent, which we did not like at all and indeed this did concern us. However, this situation rectified itself immediately once we had attached and pegged out the remaining four corner guylines. This naturally pulled taut the lower air vent material and instantly resolved the issue.
|
|
|
|
Again, this is where erecting this tent a few times will definitely be beneficial, as it gives you chance to experiment and indeed iron out any initial erection issues... did I just say that? Unless you remember or know exactly where the 120cm length setting is on your walking poles, we would suggest marking them to make life easier, this will then give you a baseline to adjust from should you wish.
This PYRAMID was certainly slightly more challenging to erect first time than the TOPWIND 1, that said, getting our walking pole heights correct would have helped. But this is something that would no doubt quickly become second nature. If you usually backpack and hike with walking poles, then the big plus with the PYRAMID tent is that there is a substantial weight-saving to be had.
UPDATE
As expected the second time we erected the PYRAMID (and with our walking poles set at exactly 120cm) it went up far easier and far faster. It rained lightly one night, but nothing that really put the tent to a test. It did get a bit blowy one night and with all guylines staked out, the tent was fine. And it is worth mentioning, with our walking poles now set to the correct length, the flysheet on the PYRAMID now pegged tight onto the ground. This meant that although the inner tent is all mesh, the blowing wind outside struggled to get in. By contrast, the flysheet of our Glencoe 1/TOPWIND 1 pegs slightly off the ground, allowing more potential air flow, but of course this then is somewhat offset by the full polyester inner tent. And of course both tents have flysheet vents to help regulate airflow depending on conditions. The PYRAMID tent has quite large vents mid-way up the two sides which you can open or close up depending upon how much ventilation you require.
Another thing that we realised about the PYRAMID tent is that if we did add a few centimetres to our walking poles height we could effectively raise the outer flysheet slightly, allowing greater air flow into the tent should conditions warrant it. In fact, we ended up actually preferring our walking poles set at 125cm. This did two things: firstly it tensioned the inner tent slightly better and secondly it raised the flysheet slightly off the ground allowing even better ventilation. It was now becoming apparent to us just how versatile the PYRAMID could be.
As already mentioned, every tent will suffer from condensation in certain conditions and generally to a certain degree, this is simply a fact of life, but as long as it runs down the inside of the outer flysheet rather than dripping onto the inner tent, then all is fine. And this is where the pyramidal shape of the PYRAMID tent works extremely well. Condensation only becomes an issue if it drips onto or down the inner tent. To date we have suffered no really serious condensation issues with either tent.
We loved the TOPWIND 1 tent from the word go, their simple but effective, straight-forward design and high quality materials immediately made them a winner for us. However, the PYRAMID tent, with its lowly weight and versatility is fast growing on us!
One thing that we would say is that the PYRAMID is probably not a tent for novice or first time campers. It is really a tent aimed at more experienced backpackers who want (or need) to shave off the grams. By contrast, our Glencoe 1/TOPWIND 1, Whisper and SHIELD tents are much more suited to the novice backpacker - they are also slightly longer more roomy tents. But as always, it's horses for courses!
GeerTop PYRAMID Tent with our Alloy Walking Poles
|

|